Atlas Shell
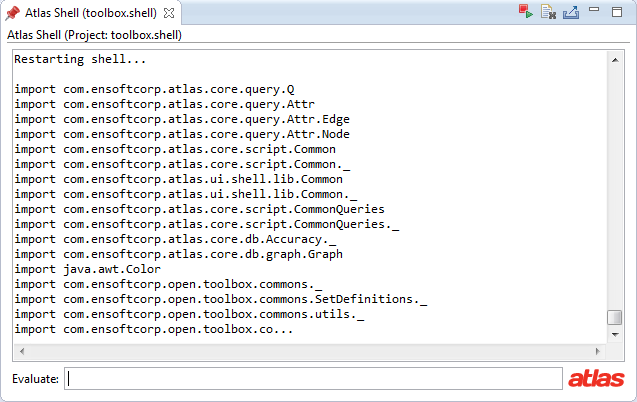
That Atlas Shell (shown below) is a Scala interpreter with the Atlas classpath and query language imports pre-configured for you. Scala is a programming language that runs in the JVM, which means that Scala and Java stacks can be freely mixed for seamless integration. If you are not familiar with Scala, one notable difference in the program syntax is that several characters such as ., (, ), and ; can be implicit. Another difference is that in Scala type declarations begin with "var" or "val" instead of the class name. While the Atlas Shell is wonderful for writing and running quick one-off queries, you could write all of your program analysis queries in Java and simply invoke the Java code from the Atlas Shell. For now let's just use the Atlas Shell to write a few quick queries.
Contents
Step 1) Import Shell Project
To open an Atlas Shell you need to have an Atlas Shell project imported into the workspace or installed into Eclipse as a plugin. A typical setup is to have the Shell project imported into the workspace. We provide a starter Shell project with a Toolbox project for you that can be used in this tutorial as well as your own projects! For more details see the Starter Toolbox Github repository at https://github.com/EnSoftCorp/Starter-Toolbox.
On your command line change your current directory to the git folder we made in the Installing Atlas section. Next, clone a copy of the repository by running the following command on your command line.
cd <my_path>/Atlas/git
git clone https://github.com/EnSoftCorp/Starter-Toolbox.git
If you need to install Git on your system visit http://git-scm.com/downloads. Alternatively you could download a zip file of the latest Starter Toolbox repository archive here https://github.com/EnSoftCorp/Starter-Toolbox/archive/master.zip.
The Starter Toolbox has a dependency on the "toolbox-commons" project. To use the Starter Toolbox you should install the toolbox-commons Eclipse plugin by following the installation instructions at https://ensoftcorp.github.io/toolbox-commons/install.html.
For this tutorial import both the Shell project (toolbox.shell) and the Toolbox project (toolbox.analysis) you downloaded in the Starter Toolbox repository into the workspace. Import the Atlas Shell and Toolbox projects into the workspace by navigating to File > Import > General > Existing Projects into Workspace and browsing to the folder containing the toolbox.shell and toolbox.analysis projects. If the projects are in a zip archive, you will want to check the Select archive file radio button, otherwise check the Select root directory radio button. Make sure the checkboxes next to both projects are selected and click Finish to import the projects into the workspace.
Step 2) Index Workspace
Now that you have an Atlas Shell project in the workspace we can run some queries against the program graph (index). Make sure you have indexed only the HelloWorld project covered in the Indexing Workspace section.
Step 3) Open/Reload Shell
To open the Atlas Shell for your toolbox.shell project navigate to Eclipse or Window > Show View > Other... > Atlas > Atlas Shell. Select the toolbox.shell project and press OK. You can have one Atlas Shell open per Atlas Shell project in your workspace, but for this tutorial we will just use the one.
Important: The Atlas Shell maintains variables in its interpreter scope, so if you change the index (or re-index a project) any variables declared in the Shell that were referencing the old index will become stale! After changing the index you should always reload the Shell by pressing the red button with the play symbol at the top right hand corner of the Shell window.
Important: When the Shell is opened or reloaded it is initialized with the current compiled bytecode of the toolbox projects it depends on. If you change the source code in a toolbox project it will not be reflected in the Shell until the Shell has been reloaded!
Step 4) Execute Queries
Let's execute some queries one at a time in the Atlas Shell. Don't worry about what they mean, we will discuss that later.
var declaresEdges = universe.edgesTaggedWithAny(Edge.DECLARES).retainEdges()
var app = declaresEdges.forward(universe.project("HelloWorld"))
var methods = app.nodesTaggedWithAny(Node.METHOD)
var initializers = app.methods("<init>") union app.methods("<clinit>")
var constructors = app.nodesTaggedWithAny(Node.IS_CONSTRUCTOR)
var callEdges = universe.edgesTaggedWithAny(Edge.CALL).retainEdges()
var graph = (methods difference (initializers union constructors)).induce(callEdges)
show(graph)
You should see an Atlas graph popup. We will take a look at that graph in more detail later.
Note: Remember that some program syntax elements in Scala are implicit. Explicitly written, the line that declaresgraph could be written as: var graph = (methods.difference(initializers.union(constructors))).induce(callEdges);
Tips and Tricks
Configure shellInit.scala
If you find yourself starting to need to import classes on Atlas Shell frequently, you can add the import to an initialization file that gets run every time the Shell is reloaded. The initialization file is called shellInit.scala and is located at the root of the Atlas Shell project.
Default Variables
If you write an expression on the Atlas shell that returns a value, but you did not assign it to a Scala variable or value then a resource variable name (ex: res0, res1, res2, ...) will be created for you.
Command History
The Atlas Shell keeps a history of the commands that you've run across reloads of the Shell. To access a previous query just press the keyboard up arrow until you find the one you want. You can clear your query history with the delete file icon in the top right hand corner of the Atlas Shell. Similarly, you can export and save your query history by pressing the export icon in the top right hand corner of the Atlas Shell.
